

Wrong.
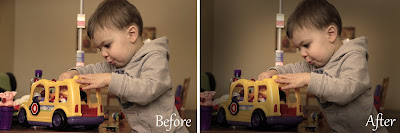
Here’s a simple step-by-step plan to easily transform a color photo to a sepia masterpiece using Photoshop CS.
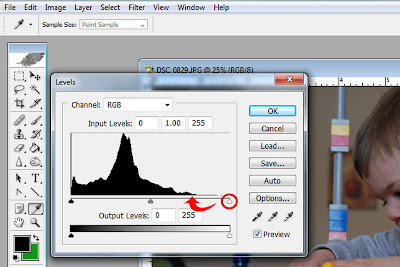
Step 1: From the “Image” drop-down menu, select “Adjustments”, and then “Levels”. This is the most difficult part of the whole process. When you look at the level map, (it’ll resemble a mountain range), you’ll notice two arrows at each bottom corner. Click and drag these arrows to the very beginning of the up-hill slope on each side. You might not have to do this- some photos already have proper levels. Don’t pull the arrows into the slope- just bring it right to the beginning of the incline.
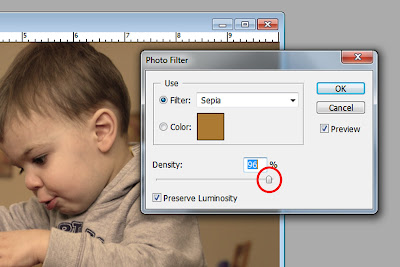
Step 2: From the “Image” drop-down menu, select “Adjustments”, and then “Photo Filter”. Choose “Sepia” from the drop-down menu. Adjust the density to desired percentage- use as much or as little brown pigment as you like. For mine, I used a ton- 96%.

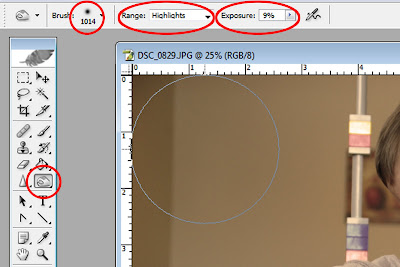
Step 3: Select the “Burn” tool from the tool panel. Make the brush nice and big, (I used 1014 pixels), change the range dropdown menu to “Highlights”, and lower the Exposure to 9%. Use the tool to darken the edges of the photo, focusing on anything particularly bright or attention-grabbing. The object of this is to further bring the focus to our subject.
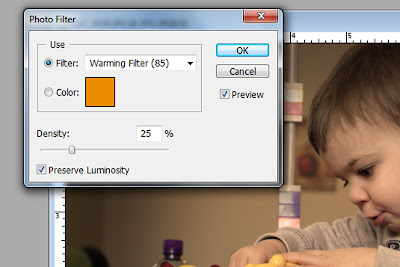
Step 4: From the “Image” drop-down menu, select “Adjustments”, and then “Photo Filter”. Select “Warming Filter 85”, and adjust the density to 25% (or desired percentage).

Step 5: From the “Image” drop-down menu, select “Adjustments”, and then “Brightness/Contrast”. Adjust the contrast to the desired level, in this case 15.


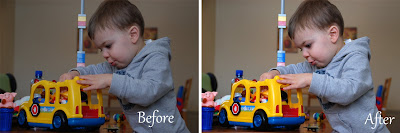
And now you’re done! Your color photo is now a sepia photo- rich in hue, aged to perfection.

Have questions about other photo-processing techniques and would like to see more tutorials? Leave your suggestion in the comment area- we hope to see you again soon!
Also: Don’t forget about the huge CONTEST going on until Friday March 11- you could win a whole bunch of free digital scrapbooking stuff!
No comments:
Post a Comment